- Zero-Cost Entry: Paper crafting remains the most accessible art form, requiring only basic household items like printer paper, old newspapers, and simple tools.
- The “Scrap” Movement: 2026 trends emphasize junk journaling, collage layering, and upcycling discarded packaging and mail into rich, tactile art surfaces.
- Cognitive Benefits: Precision folding disciplines such as origami are linked to enhanced spatial reasoning, problem-solving ability, and bilateral brain coordination.
- Eco-Friendly Decor: Paper wall hangings, lanterns, and sculptural installations are emerging as the leading sustainable alternatives to plastic-based décor.
- Hybrid Art: Modern creators increasingly combine traditional paper cutting with digital templates and print-and-fold systems for professional-grade results.
Introduction: The Renaissance of Paper in 2026

Paper—once considered a disposable medium—is experiencing a creative renaissance. In an era dominated by screens and AI-generated visuals, artists and hobbyists alike are returning to tactile, hands-on practices that slow the mind and reward patience.
The Global Craft Surge
According to 2025 consumer trend data, the global DIY paper craft market has grown at an average rate of 4.8% annually, driven by demand for affordable, screen-free creative outlets. Paper crafting sits at the intersection of mindfulness, sustainability, and accessibility—three defining values of modern creative culture.
The Stress Metric
Scientific studies on tactile creativity suggest that just 20 minutes of focused paper folding can measurably reduce heart rate and blood pressure in high-stress individuals. The rhythmic repetition of folds activates the parasympathetic nervous system, making paper craft a form of active meditation.
The Purpose
This guide serves as your definitive resource for easy art and craft with paper step by step, proving that museum-quality results don’t require expensive supplies—only thoughtful design and technique.
Paper is the ideal starting point for any creative journey. If you’re ready to explore beyond paper—into painting, sculpture, or mixed media—visit our master resource:
The Big Book of Art Project Ideas: Find Your Next Masterpiece.
Essential Supplies: What You Need (And What You Don’t)
One of paper craft’s greatest strengths is its low barrier to entry. Minimal tools often produce the most elegant results.
Choosing Your Foundation: White vs. Colour Paper
Easy art and craft with white paper
White paper emphasizes form, shadow, and structure. Techniques like embossing, scoring, and kirigami rely on light interaction to create depth without color. White paper is ideal for architectural folds, minimalist wall art, and shadow boxes.
Easy art and craft with colour paper
Color paper introduces emotional tone and visual hierarchy. High-contrast layering improves readability in flowers, mobiles, and paper sculptures. Understanding basic color theory—warm vs. cool, complementary contrasts—dramatically improves results.
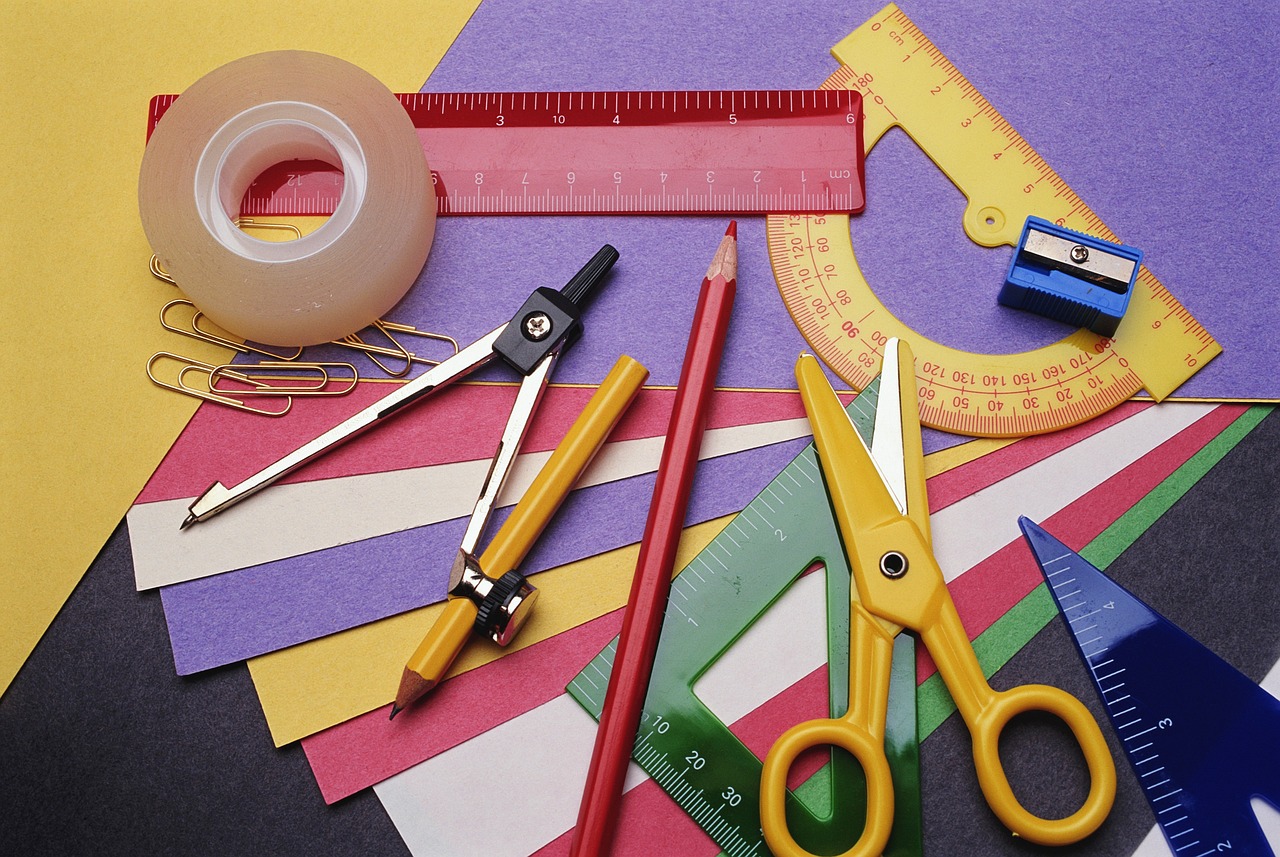
The Toolkit
Precision blades vs. safety scissors
- Precision blades offer clean edges for silhouettes and templates
- Safety scissors are ideal for quick projects and children’s crafts
Adhesives
- Glue sticks work best for flat surfaces and collage
- Double-sided tape ensures clean joins in 3D structures
- Many advanced projects rely on folding, slots, or tension—no glue required
Paper-based home décor is not just decorative—it is spatial design using lightweight architecture. These projects focus on how paper occupies space, interacts with light, and alters perception within a room.
Section 1: Floral Elegance (The Most Popular Category)
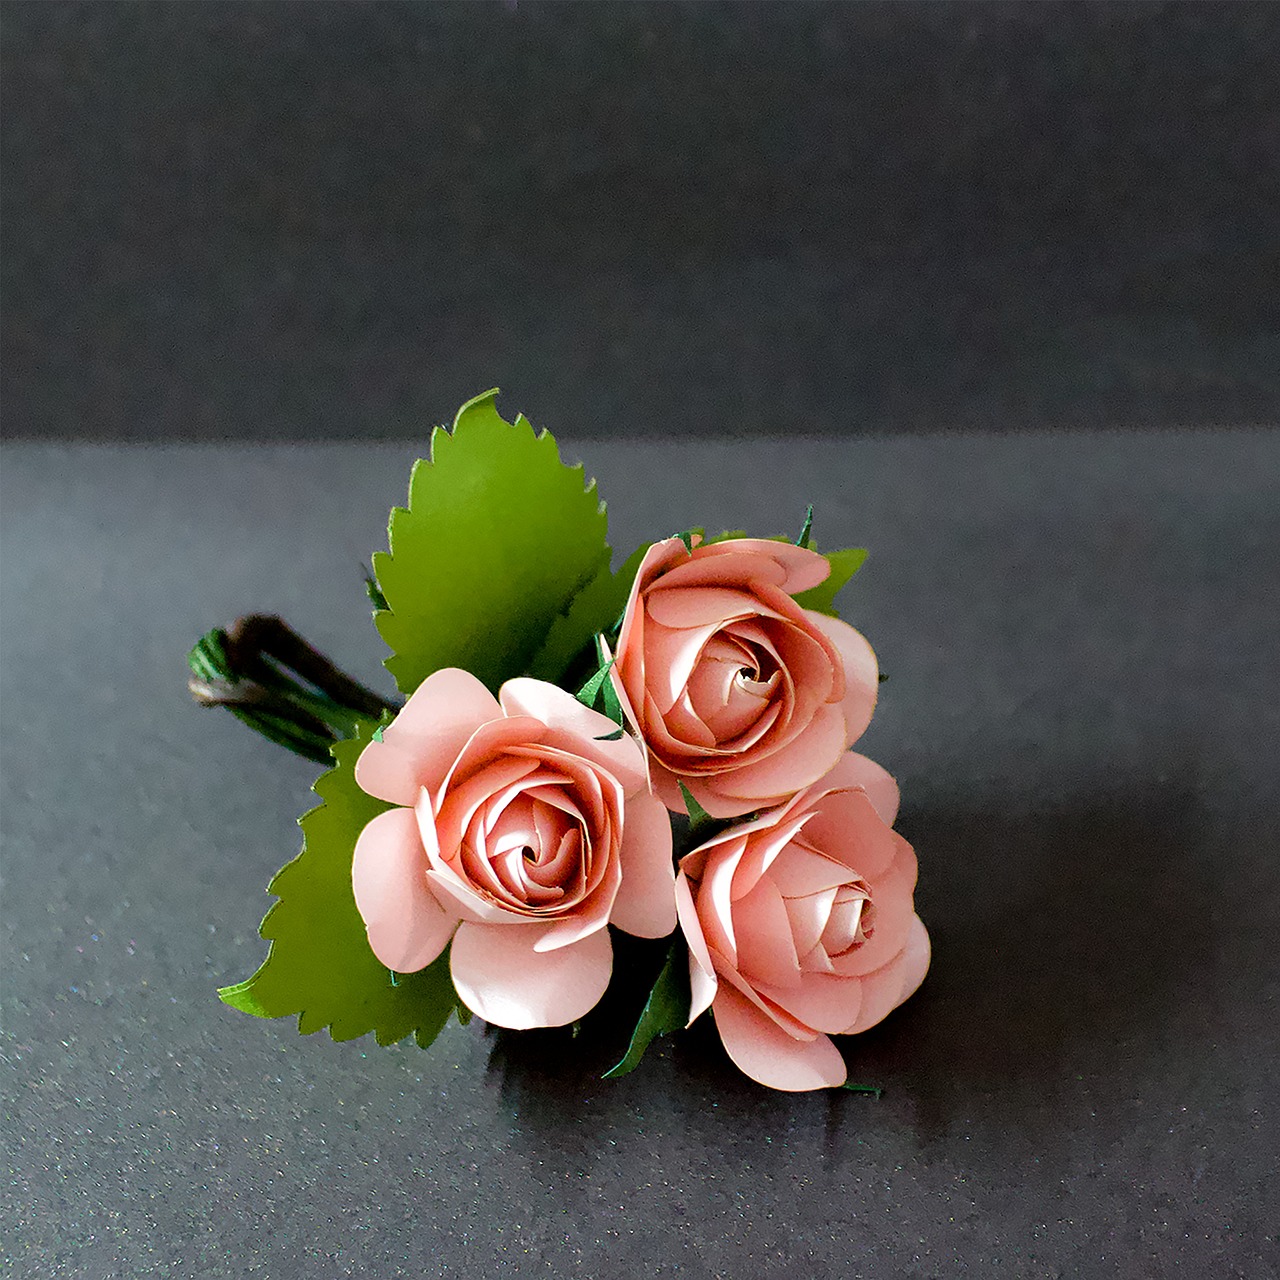
Paper flowers remain the most searched and shared paper craft category due to their versatility and decorative impact.
Art and craft with paper flowers easy: The 5-Minute Peony
This beginner-friendly project uses accordion folding and center-binding to simulate layered petals.
Project 1: The Giant Paper Rose (Wall Decor)
Best Use: Feature walls, event backdrops, photo corners
Skill Level: Beginner–Intermediate
Materials: Color paper or cardstock, pencil, scissors, glue or tape, optional floral wire
Step-by-Step Mini Tutorial:
- Draw or print spiral rose templates in increasing sizes.
- Cut each spiral carefully, keeping edges smooth.
- Starting from the outer edge, roll the spiral inward tightly.
- Loosen slightly to allow natural petal spacing.
- Secure the base with glue or tape.
- Gently curl outer petals outward using fingers or a pencil.
- Mount directly on walls or attach to stems for standing décor.
Expert Tips:
- Use thicker cardstock for large roses to prevent sagging.
- Slightly irregular petal edges make the rose look more organic.
- Gradient shades (light center → darker edges) add depth.
Common Mistakes:
- Rolling too tightly, resulting in stiff, unnatural flowers.
- Using thin paper for large roses, causing collapse.
- Perfect symmetry — real flowers are imperfect.
Project 2: Delicate Lavender Sprigs (Gift Toppers)
Best Use: Gift wrapping, scrapbooking, table décor
Skill Level: Beginner
Materials: Thin purple or pastel paper, scissors, floral wire or toothpicks, tape or glue
Step-by-Step Mini Tutorial:
- Cut narrow paper strips (approx. 1–1.5 cm wide).
- Make small angled snips along one edge to form buds.
- Wrap the uncut edge tightly around floral wire or toothpick.
- Secure the base with a small dot of glue or tape.
- Gently pinch buds outward for texture.
- Create multiple sprigs and bundle them together.
Expert Tips:
- Thinner paper creates more realistic buds.
- Vary strip length slightly for natural-looking clusters.
- Neutral green stems balance pastel blooms visually.
Common Mistakes:
- Cutting too deeply, weakening the strip.
- Using thick paper that doesn’t wrap cleanly.
- Uniform bud size, which looks artificial.
Section 2: Home Decor & Spatial Art
Paper-based home décor has evolved from temporary decorations into intentional spatial design elements. Unlike canvas or wood, paper interacts with airflow, light, and shadow, making it uniquely suited for dynamic interiors.
Wall hanging easy art and craft with paper

Wall hangings made from paper rely on visual rhythm rather than permanence. The goal is not durability but impact. Strategic repetition of shapes—circles, triangles, feathers, or folded panels—creates cohesion across large surfaces.
When designing wall hangings, consider negative space as part of the artwork. Leaving breathing room between elements enhances depth and prevents visual clutter. Lightweight paper also allows subtle motion from air circulation, giving installations a kinetic quality that rigid materials cannot replicate.
Project 3: Modern Geometric Mobiles (using the “Balance and Weight” principle)
Materials: Cardstock or construction paper, thread, needle, stick/hoop
Step-by-Step Mini Tutorial:
- Cut geometric shapes (circles, triangles, hexagons) in 2–3 sizes.
- Punch a small hole near the center or edge of each shape.
- Thread shapes vertically, spacing heavier shapes lower.
- Suspend strands from a horizontal stick or embroidery hoop.
- Adjust lengths until the mobile hangs level and moves freely.
Expert Tips:
- Use thicker paper for anchor shapes and thinner paper for movement.
- Odd numbers of strands feel more natural than symmetrical layouts.
Common Mistakes:
- Using paper that is too light, causing tangling.
- Hanging all elements at equal length (kills motion).
Project 4: The 3D Paper Feather Wall Fan
Materials: Color or white paper, pencil, scissors, glue or tape
Step-by-Step Mini Tutorial:
- Cut elongated oval shapes for feathers.
- Snip fine cuts along both sides for texture.
- Curl each feather gently with fingers or a dowel.
- Arrange feathers in a radial pattern on a base circle.
- Layer from outer edge inward for depth.
Expert Tips:
- Slight asymmetry makes feathers feel more organic.
- Monochrome palettes highlight texture better than bright colors.
Common Mistakes:
- Over-cutting feathers, making them fragile.
- Flattening layers instead of letting them overlap naturally.
Art and craft with paper for home decoration easy
Paper décor excels in temporary transformation—seasonal changes, rental spaces, and minimalist homes benefit most.
Project 5: Minimalist Paper Lanterns (Warm lighting effects)

Materials: Thin paper, ruler, craft knife, LED light
Step-by-Step Mini Tutorial:
- Fold paper accordion-style or into vertical panels.
- Cut repeating slits or shapes along folded edges.
- Open paper into a cylinder and secure ends.
- Insert LED light inside.
- Test lighting in a dark space to adjust cut density.
Expert Tips:
- Warm LEDs create softer shadows than white LEDs.
- Vary slit sizes to control shadow intensity.
Common Mistakes:
- Using real candles (fire hazard).
- Cutting too many openings, weakening structure.
Project 6: Shadow Box Frames: Layering landscapes with cardstock
Materials: Cardstock, foam spacers, frame, craft knife
Step-by-Step Mini Tutorial:
- Sketch foreground, midground, and background layers.
- Cut each layer separately with increasing simplicity.
- Stack layers using foam spacers for depth.
- Secure inside a frame.
- Test lighting angle for shadow enhancement.
Expert Tips:
- Fewer layers with more spacing look better than many tight layers.
- Side lighting enhances depth illusion.
Common Mistakes:
- Over-detailing background layers.
- Flattening layers without spacing.
Section 3: Engineering Without Glue (The “No-Mess” Challenge)
This section highlights paper engineering principles, where structure is achieved through folds, slots, and tension alone. These projects develop spatial intelligence and problem-solving skills.
Art and craft with paper easy without glue
Project 7: Modular Origami: The Sonobe Unit
Materials: Square paper sheets (same size)
Step-by-Step Mini Tutorial:
- Fold each square into a Sonobe unit.
- Create at least 6 identical units.
- Insert flaps into pockets to lock units together.
- Build outward symmetrically.
- Adjust tension for stability.
Expert Tips:
- Precision folding matters more than speed.
- Use stiffer paper for larger models.
Common Mistakes:
- Mixing paper sizes.
- Forcing flaps, causing tears.
Project 8: Paper Slotted Animals (Interlocking design)
Materials: Cardstock, craft knife
Step-by-Step Mini Tutorial:
- Draw or print animal templates.
- Cut pieces carefully, including slots.
- Insert slots gently at right angles.
- Adjust alignment for balance.
- Test stability on a flat surface.
Expert Tips:
- Slots should be paper-thickness wide.
- Symmetry ensures balance.
Common Mistakes:
- Cutting slots too wide.
- Using flimsy paper.
Project 9: The Infinite Folding Cube (Fidget toy)
Materials: Paper, tape (optional)
Step-by-Step Mini Tutorial:
- Fold paper strips into linked cube segments.
- Connect segments into a loop.
- Reinforce folds for durability.
- Test folding motion repeatedly.
- Adjust tension if movement sticks.
Expert Tips:
- Crisp folds improve motion.
- Reinforce stress points early.
Common Mistakes:
- Uneven folds.
- Over-tightening connections.
Section 4: Detailed Step-by-Step Guides (Projects 10–15)
These advanced projects move from casual crafting into intentional craftsmanship, requiring patience and refined technique.
Project 10: How to make art and craft with paper easy through Quilling (Paper Filigree)
Steps:
- Cut uniform paper strips.
- Roll tightly using fingers or tool.
- Shape coils into teardrops or spirals.
- Arrange design before gluing.
- Mount on backing paper.
Expert Tips: Control coil tightness for consistency.
Common Mistakes: Uneven strip width.
Project 11: Papermaking from Scraps (The sustainability angle)
Steps:
- Shred waste paper.
- Soak overnight.
- Blend into pulp.
- Press pulp onto mesh.
- Dry completely.
Expert Tips: Mix fibers for texture.
Common Mistakes: Over-blending pulp.
Project 12: Pop-up Architecture for Greeting Cards
Steps:
- Fold card base.
- Cut parallel slits.
- Push tabs inward.
- Add façade details.
- Test open-close motion.
Expert Tips: Start with simple forms.
Common Mistakes: Cutting past fold lines.
Project 13: The Woven Paper Basket (Utilizing newspaper/magazines)
Steps:
- Roll paper strips tightly.
- Create base grid.
- Weave vertically.
- Secure rim.
- Shape basket walls.
Expert Tips: Dampen paper slightly for flexibility.
Common Mistakes: Loose weaving.
Project 14: Silhouette Portrait Cutting
Steps:
- Trace profile outline.
- Simplify shapes.
- Cut slowly with blade.
- Mount on contrasting background.
- Frame neatly.
Expert Tips: Focus on nose and chin accuracy.
Common Mistakes: Over-detailing.
Project 15: 3D Paper Succulents (The “Never Die” Plant)
Steps:
- Cut petal templates.
- Shape with gentle curves.
- Assemble center outward.
- Layer symmetrically.
- Mount in pot or frame.
Expert Tips: Slight size variation adds realism.
Common Mistakes: Flat petals.
Conclusion: Transforming Scraps into Significance
Mastering paper craft is not about perfection—it’s about perception. When you learn to see potential in scraps, folds, and offcuts, you develop the mindset of a true maker. These easy art and craft with paper step by step projects build not only skill, but creative confidence.
If you’re ready to move beyond paper into mixed media, textiles, or digital workflows, explore our comprehensive guide:
The Big Book of Art Project Ideas: Find Your Next Masterpiece.
Key Takeaways: Learn from the Authorities Who Shape Paper Art
To deepen your skills beyond basic tutorials, learning from established paper art institutions and creators helps bridge the gap between DIY craft and professional-level execution.
OrigamiUSA remains the global authority on paper folding systems, mathematical origami, and precision-based models. Their structured diagrams and fold notation systems are especially valuable for anyone exploring origami for beginners, modular origami, or paper engineering principles.
For creators interested in material quality, The Paper Place offers extensive insight into cardstock vs. construction paper, handmade paper traditions, and specialty textures. Understanding paper grain, thickness, and fiber composition dramatically improves outcomes in shadow boxes, lanterns, and 3D paper sculptures.
If you want to see how paper functions as a fine art medium, the paper-focused collections on Colossal Art showcase large-scale installations and contemporary artists pushing the limits of scale, structure, and conceptual storytelling using paper alone. These examples are particularly useful for inspiration in DIY paper sculpture and spatial art.
For timeless, approachable techniques rooted in practicality, Martha Stewart Crafts provides reliable guidance on classic DIY methods, home décor standards, and polished finishing techniques. Their projects reinforce craftsmanship fundamentals that apply across floral paper art, wall hangings, and decorative accents.
Together, these resources demonstrate how paper craft spans hobby, design, engineering, and fine art—making it one of the most versatile creative mediums available.
FAQs: Easy Art and Craft with Paper
What is the easiest paper craft for absolute beginners?
Simple folded projects like accordion flowers, basic origami shapes, or paper lanterns are ideal starting points. These require minimal tools and help beginners understand folding accuracy and paper behavior.
Which paper is better for detailed paper cutting projects?
Cardstock is better for precision cutting techniques because it holds edges cleanly, while construction paper is more forgiving for beginners but less suitable for silhouettes or intricate templates.
Can paper crafts be used as permanent home décor?
Yes, when kept away from moisture and direct sunlight. Framed shadow boxes, paper wall hangings, and geometric mobiles can last for years with proper placement.
How do no-glue paper projects stay together?
They rely on paper engineering principles such as tension, interlocking slots, modular folding, and weight distribution. Origami and slotted designs are classic examples.
Is paper crafting environmentally friendly?
Paper craft is one of the most sustainable art forms, especially when using recycled paper, newspapers, or scrap materials. Projects like handmade papermaking and woven baskets actively support upcycling.
What skills does paper crafting improve besides creativity?
Paper crafting strengthens fine motor control, spatial reasoning, patience, and problem-solving. Precision folding and cutting also improve hand–eye coordination.
How do artists make paper sculptures look professional?
Professional results come from consistent measurements, clean folds, controlled repetition, and understanding how light and shadow interact with layered paper forms.
Can digital tools be combined with traditional paper craft?
Yes. Many artists use digital templates, vector cutting files, or printable guides alongside hand-folding and cutting, creating hybrid workflows that improve accuracy and scalability.